Behind The Scenes:
This is a step by step guide through the dramas of
creating one single image from part 3 of Closure.
if you've read the basic 3d tutorial, this will now
make sense :)
Step one:
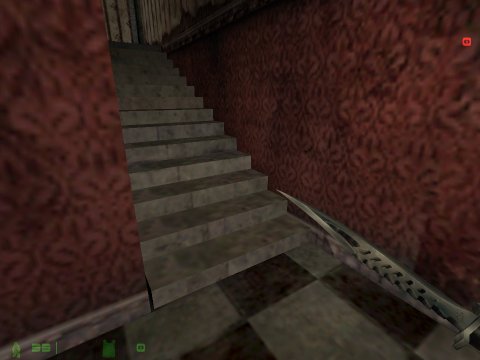
Take the in-game screenshot, allow for cropping space,
and watch where your weapon is, you dont want your knife
or gun waving through your image excessively. Crop the
image as large as you can, the more room you have now will
pay off later.
Step two:
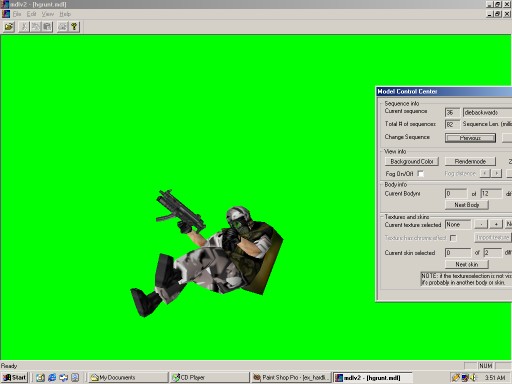
It's always a good rule to put your background figures
in first, so you can keep layering up towards the foreground
but I didn't do that. Tsk tsk. The Protocol grunt model is
manuevered into position, and green screened.
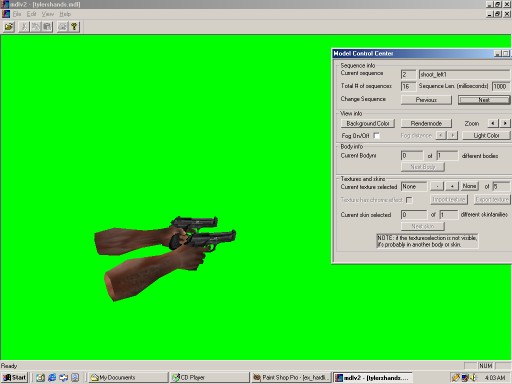
Step three:
The next major layer, is also put into position and green screened.
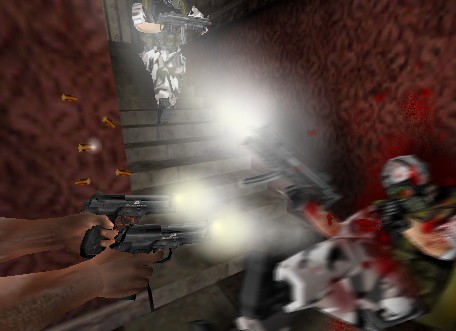
Step four:
The background figure coming down the stairs is given a shadow and an
opacity drop.
The falling Protocol grunt has blood and bullet holes added, along with
the gunfire lens flare from his firearm, blood spatter on the wall
behind and a directed shadow. The layer is then motion blurred to create
what else? Motion.
Tyler's arms with twin Berettas' are added, along with gunfire lighting
and added gunshell models, with the occasional shine.
I do gunfire with a base at the muzzle of pale yellow, then lightly drop
a larger area of white, at increasing size, over the top. Do whatever you
feel looks right.
The finished image, spare for text is this:
Back.